How To Put in Long Dressage Knots, Presented by Wahl


Can’t bear cutting your horse’s luscious long locks for traditional button braids in the show ring? Here is a great tutorial from Wahl Brand Ambassador Jaimie Lewellyn on how to get your long-maned equine partners into coiffed dancing dressage beauties! This is a great alternative for the baroque breeds that require long manes. Braiding your own horse doesn’t have to be a daunting task, just follow these step-by-step tips and practice, practice, practice!
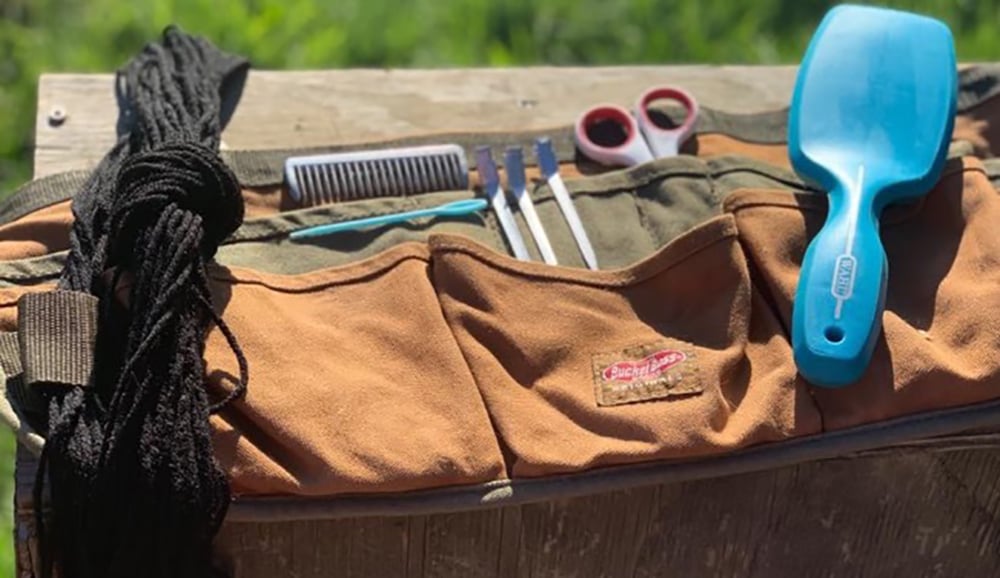
To start you will need to gather some tools:
- Mane brush
- Pulling comb
- Yarn cut to 12-16” lengths; 10-15 pieces
- Hair clips
- Spray bottle with water or braiding spray
- Scissors
- Step stool
- Large yarn needle (metal is best)
- Apron, or tool belt
Step 1: Use your pulling comb to measure the width of your braids, and clip the excess hair off to the side. You can start at the poll or withers; typically, with horses that are not experienced being braided or a little head shy I will start at the withers and work my up to the poll. For long manes I keep the braid widths very even; about the width of my comb. For very thick manes you will have to make them a bit thinner than the width of the comb so that you will not have braids the size of softballs hanging off the horse’s neck.

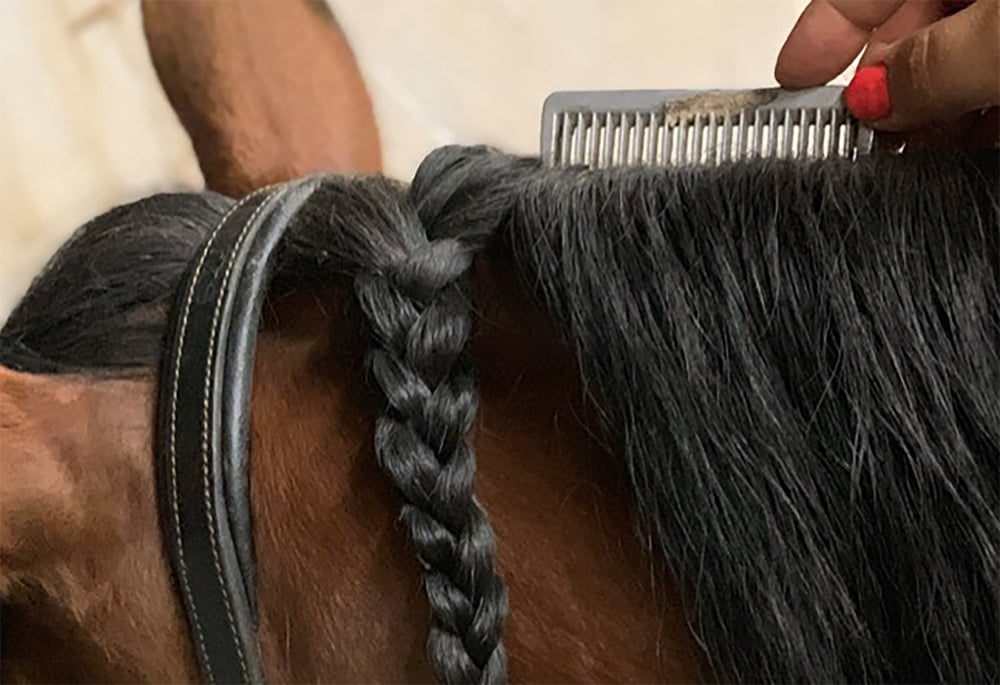
Step 2: Wet the hair with spray of choice and braid the hair down placing the yarn folded in half into your braid about ¾ of the way down braid as far down as possible and tie the braid off using the yarn with a knot. You can continue to do this process to the entire mane.

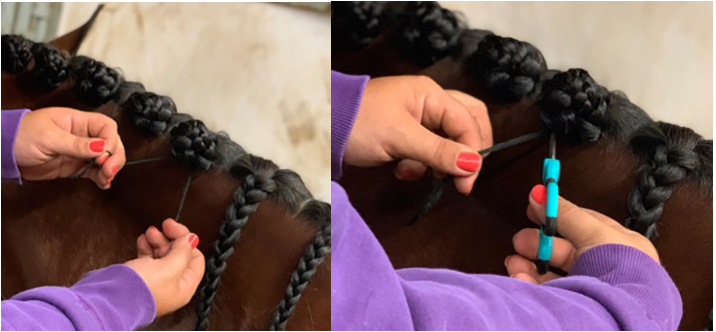
Step 3: This is where things start getting serious! This is where you will take the long braid and tie it into a knot around itself. Snug the knot up to the crest of the neck. You will then wrap the tail around the knot several times (almost like making a cinnamon roll shape) until you have about an inch of braid left.
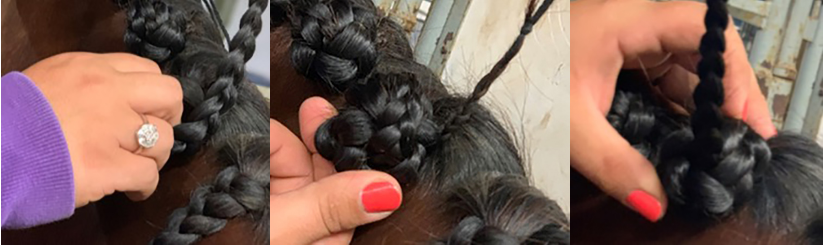
Step 4: Thread needle onto yarn and sew through the braid from the back on each side, pulling the needling and yarn down through the bottom.
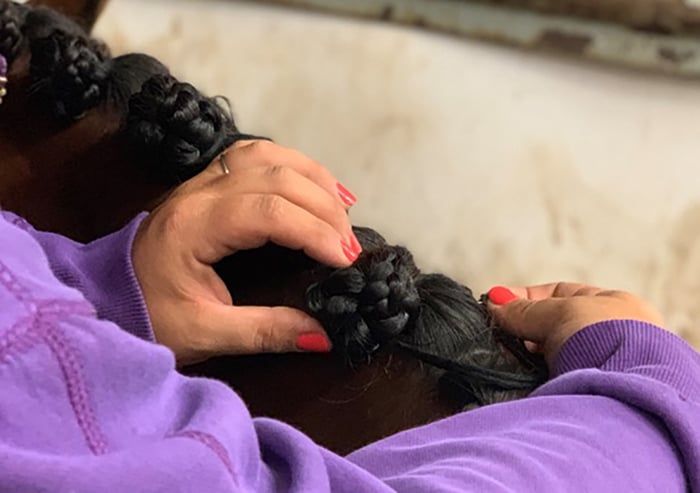
Step 5: After sewing around the knot several times each way, remove needle and tie the two yarn tails into 2-3 knots on top of either to secure. Cut off tails, making sure you do not cut the knot you just tied!
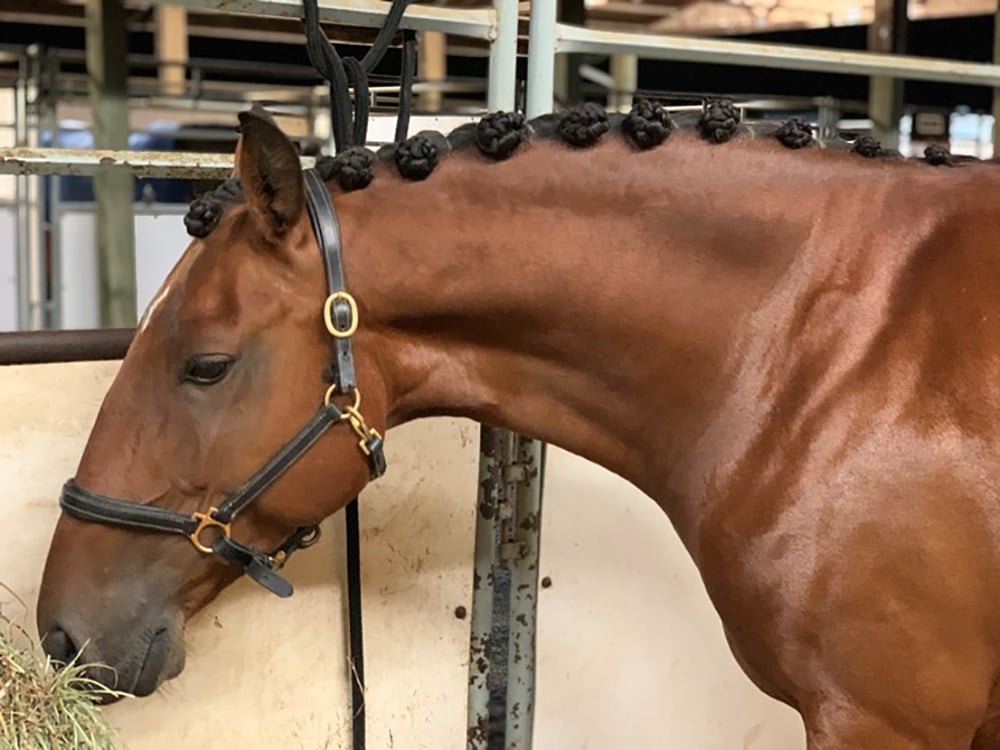
Finished Product!
Jaimie Lewellyn is a professional groom and braider, serving the Pacific Northwest sport horse community. Follow her on Facebook – Body Clipping by Jaimie – or Instagram @jannelewellyn for more braiding tips and tricks!